
What To Expect On Your First Visit
Step 1
Consultation and Design
-
Consultation: The artist discusses the client’s desired shape, color, and overall eyebrow look. They also take into consideration the client's face shape, skin type, and existing eyebrow shape.
-
Brow Mapping: The artist uses a pencil or a ruler to outline the ideal brow shape on the client’s skin, ensuring it is symmetrical and proportional. The client approves the shape before proceeding.
Step 2
Preparation of the Skin
-
The area around the brows is cleaned thoroughly to remove any oils, dirt, or makeup. This ensures the pigment adheres properly to the skin.
-
The skin is also sanitized to prevent any risk of infection.
Step 5
Aftercare and Follow-Up
-
The artist provides aftercare instructions, including how to keep the brows clean and moisturized, avoid picking or scratching, and avoid sun exposure.
-
A follow-up appointment is usually scheduled 6-8 weeks after the initial session to assess how the brows healed and to make any necessary touch-ups.
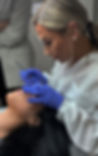
Step 3
Microblading Process
-
Using a specialized hand tool with fine needles, the artist creates tiny hair-like strokes by depositing pigment into the upper layers of the skin.
-
The strokes are applied one by one, following the natural direction of the client's existing brow hairs for a more natural appearance.
Step 4
Pigment Application
-
After the initial strokes are created, the artist applies a layer of pigment over the area to ensure the color saturates the strokes and is absorbed properly into the skin.
-
The pigment is allowed to sit for a few minutes before excess pigment is wiped away.
WHILE YOUR SKIN HEALS, BE PREPARED FOR THE COLOR INTENSITY OF YOUR PROCEDURE TO BE SHARPER AND DARKER than what is expected for the final outcome. These steps ensure a detailed and precise microblading procedure to give the client natural-looking eyebrows.